A few months ago, I got the idea for a dual extrusion setup that would reuse a lot of the stock components, and talked to Tom Jones and a few others about it. I also had been working on cable chain modifications and fixing the printer’s other shortcomings. The dual extruder got put on hold because the stock Troodon board was limiting.
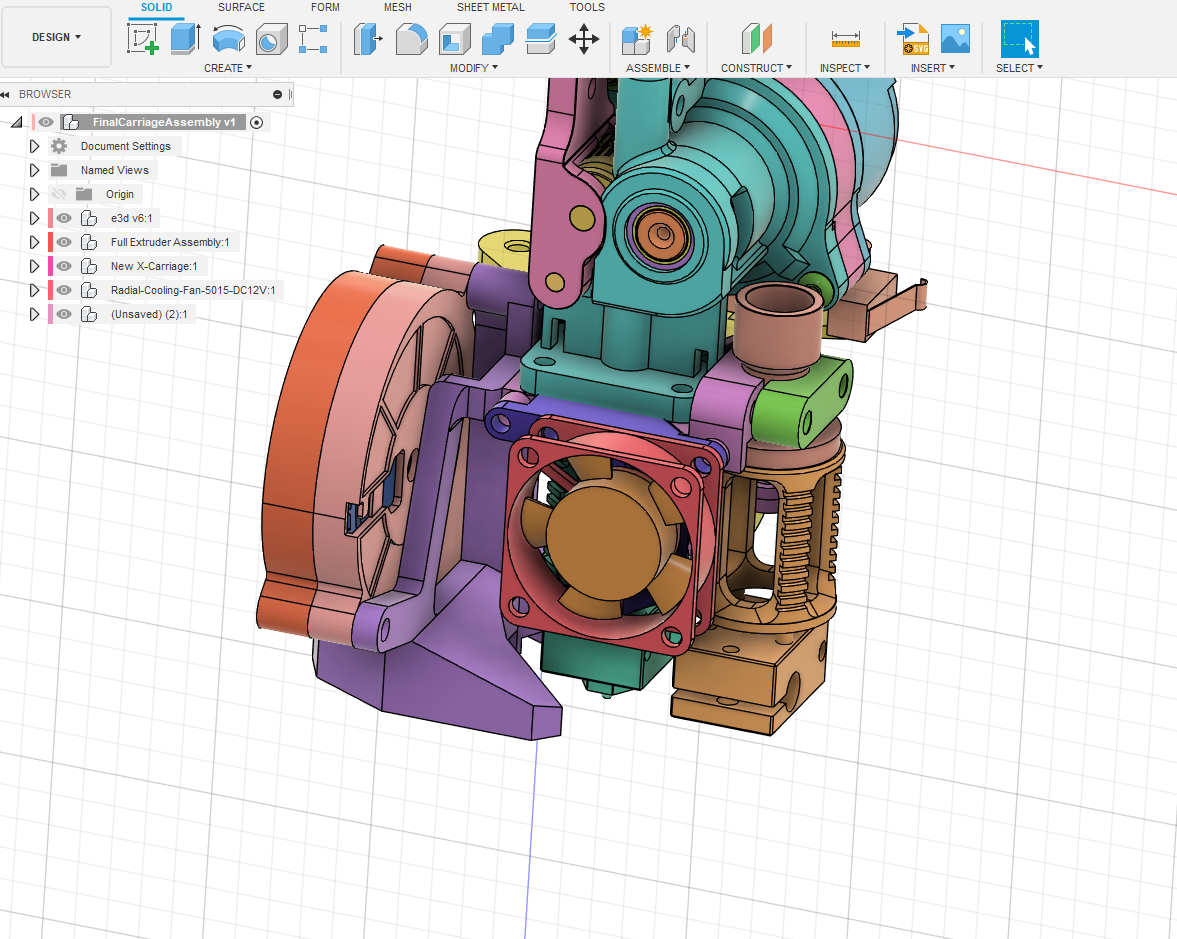
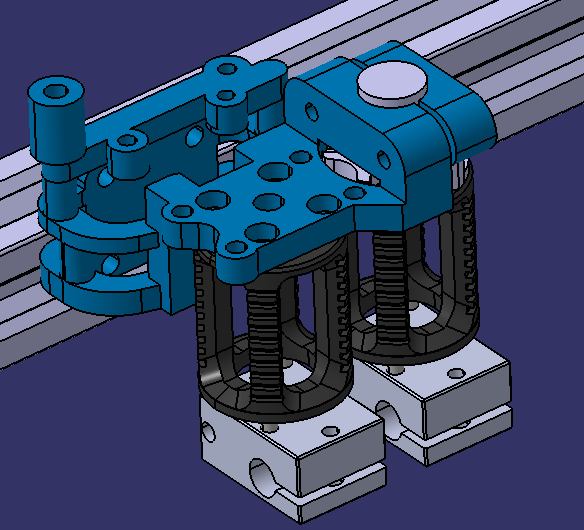
I focused on Klipper and RRF3 while trying simplify things, to improve prints. I was able to get amazing prints, but it took excessive calibration and attention to detail. Most troublesome was the constant required attention. The main issue was the cable chain, which then magnified other issues, such as the play in the guide. This is all because of a few things, including partially user error due to lack of instructions. The stock setup has a long moment arm and adding the DDE (direct drive extruder) increases the slop, “depending on other factors anywhere from a little to a very large amount that manifests as banding and ugly walls.” So, fast forward I figured out Klipper and got RRF3 working properly, and during this I tried over 500 dollars in rails from Amazon and AliExpress to Hiwinn, Ldo and THK. I found that no matter what, if I lifted the cable chain by hand, I could measure close to a millimeter of deviation with a laser attached to the hotend. So I then talked to Tom Jones again, and this time felt I would be able to figure the control scheme out for the second extruder, without replacing the board. I also had been running my stock rail on it’s side. We proceeded to design a gantry upgrade that incorporated the New 2.4 belt path that I had been running a version of, with a floating rail to reduce weight. Also we stepped up the size of the rail to increase accuracy at the same time. My main goals were that I wanted to not lose build space, and I wanted to have the dual hotends weigh close to or less than the stock . We achieved the goal, but we still had the crap cable chain.
Now Jake Allen was back to the group as “He bought a Troodon since he previously had one at work, but then no longer had access so he had stepped back.” He wanted to collaborate, so we sent him everything and I started working with Jake and Tom at the same time. However, we had different goals in mind. He wanted “modular with single hotend”. So early on, he asked what guidelines I wanted him to adhere to, so I told him to just keep everything somewhat compatible with each other, and try to minimize weight and loss of build area. It quickly became apparent that it could not happen that way, with a modular design, so I said, “let’s just continue developing both and figure it out,” but every time we updated the mounts or design, Jake incorporated it into his. Around this time, Tom got much busier and I said I need to just do the cable chain, since it is stupid to do this in two steps, it would be waste of work and money. Jake then made a parametric version of the Panzer chain, and I worked out a path and hacked some mounts together. I was able to get it up and running after a few iterations, which proved the wires were long enough if we were creative. Jake then helped me clean up the files and kept teaching me more CAD tricks and commands. So now we had two viable designs. One was a mosquito-centric, but dragon compatible, single hotend setup that could support two fans and a second hotend on the front. This was a jack of all trades, but it was heavier and you would lose around 35-y off each hotend. If you needed to use the supports for the full print, it would lose a lot. I was worried about the plastic mount for the hotend, but it seemed good for someone not really planning on using dual extrusion except occasionally. The original design at this point was able to run dual extruders, with no loss of travel on the main hotend, and 5 to 10 x less with the second hotend. However, it could not support 2 fans and the parts were not modular, “Meaning, a fan duct for one side could not just be mirrored and mount on the other,” but I felt that if I am printing the parts for add-ons, it doesn’t matter to me if I have to design different hole patterns for different sizes. So it was now where one design did what it did better, but the other did more things. So as always, it was either more flexible, or better performance with less options. We had tried the dual setup with Jake’s side by side, but it had to be spaced really wide and it seemed not viable.
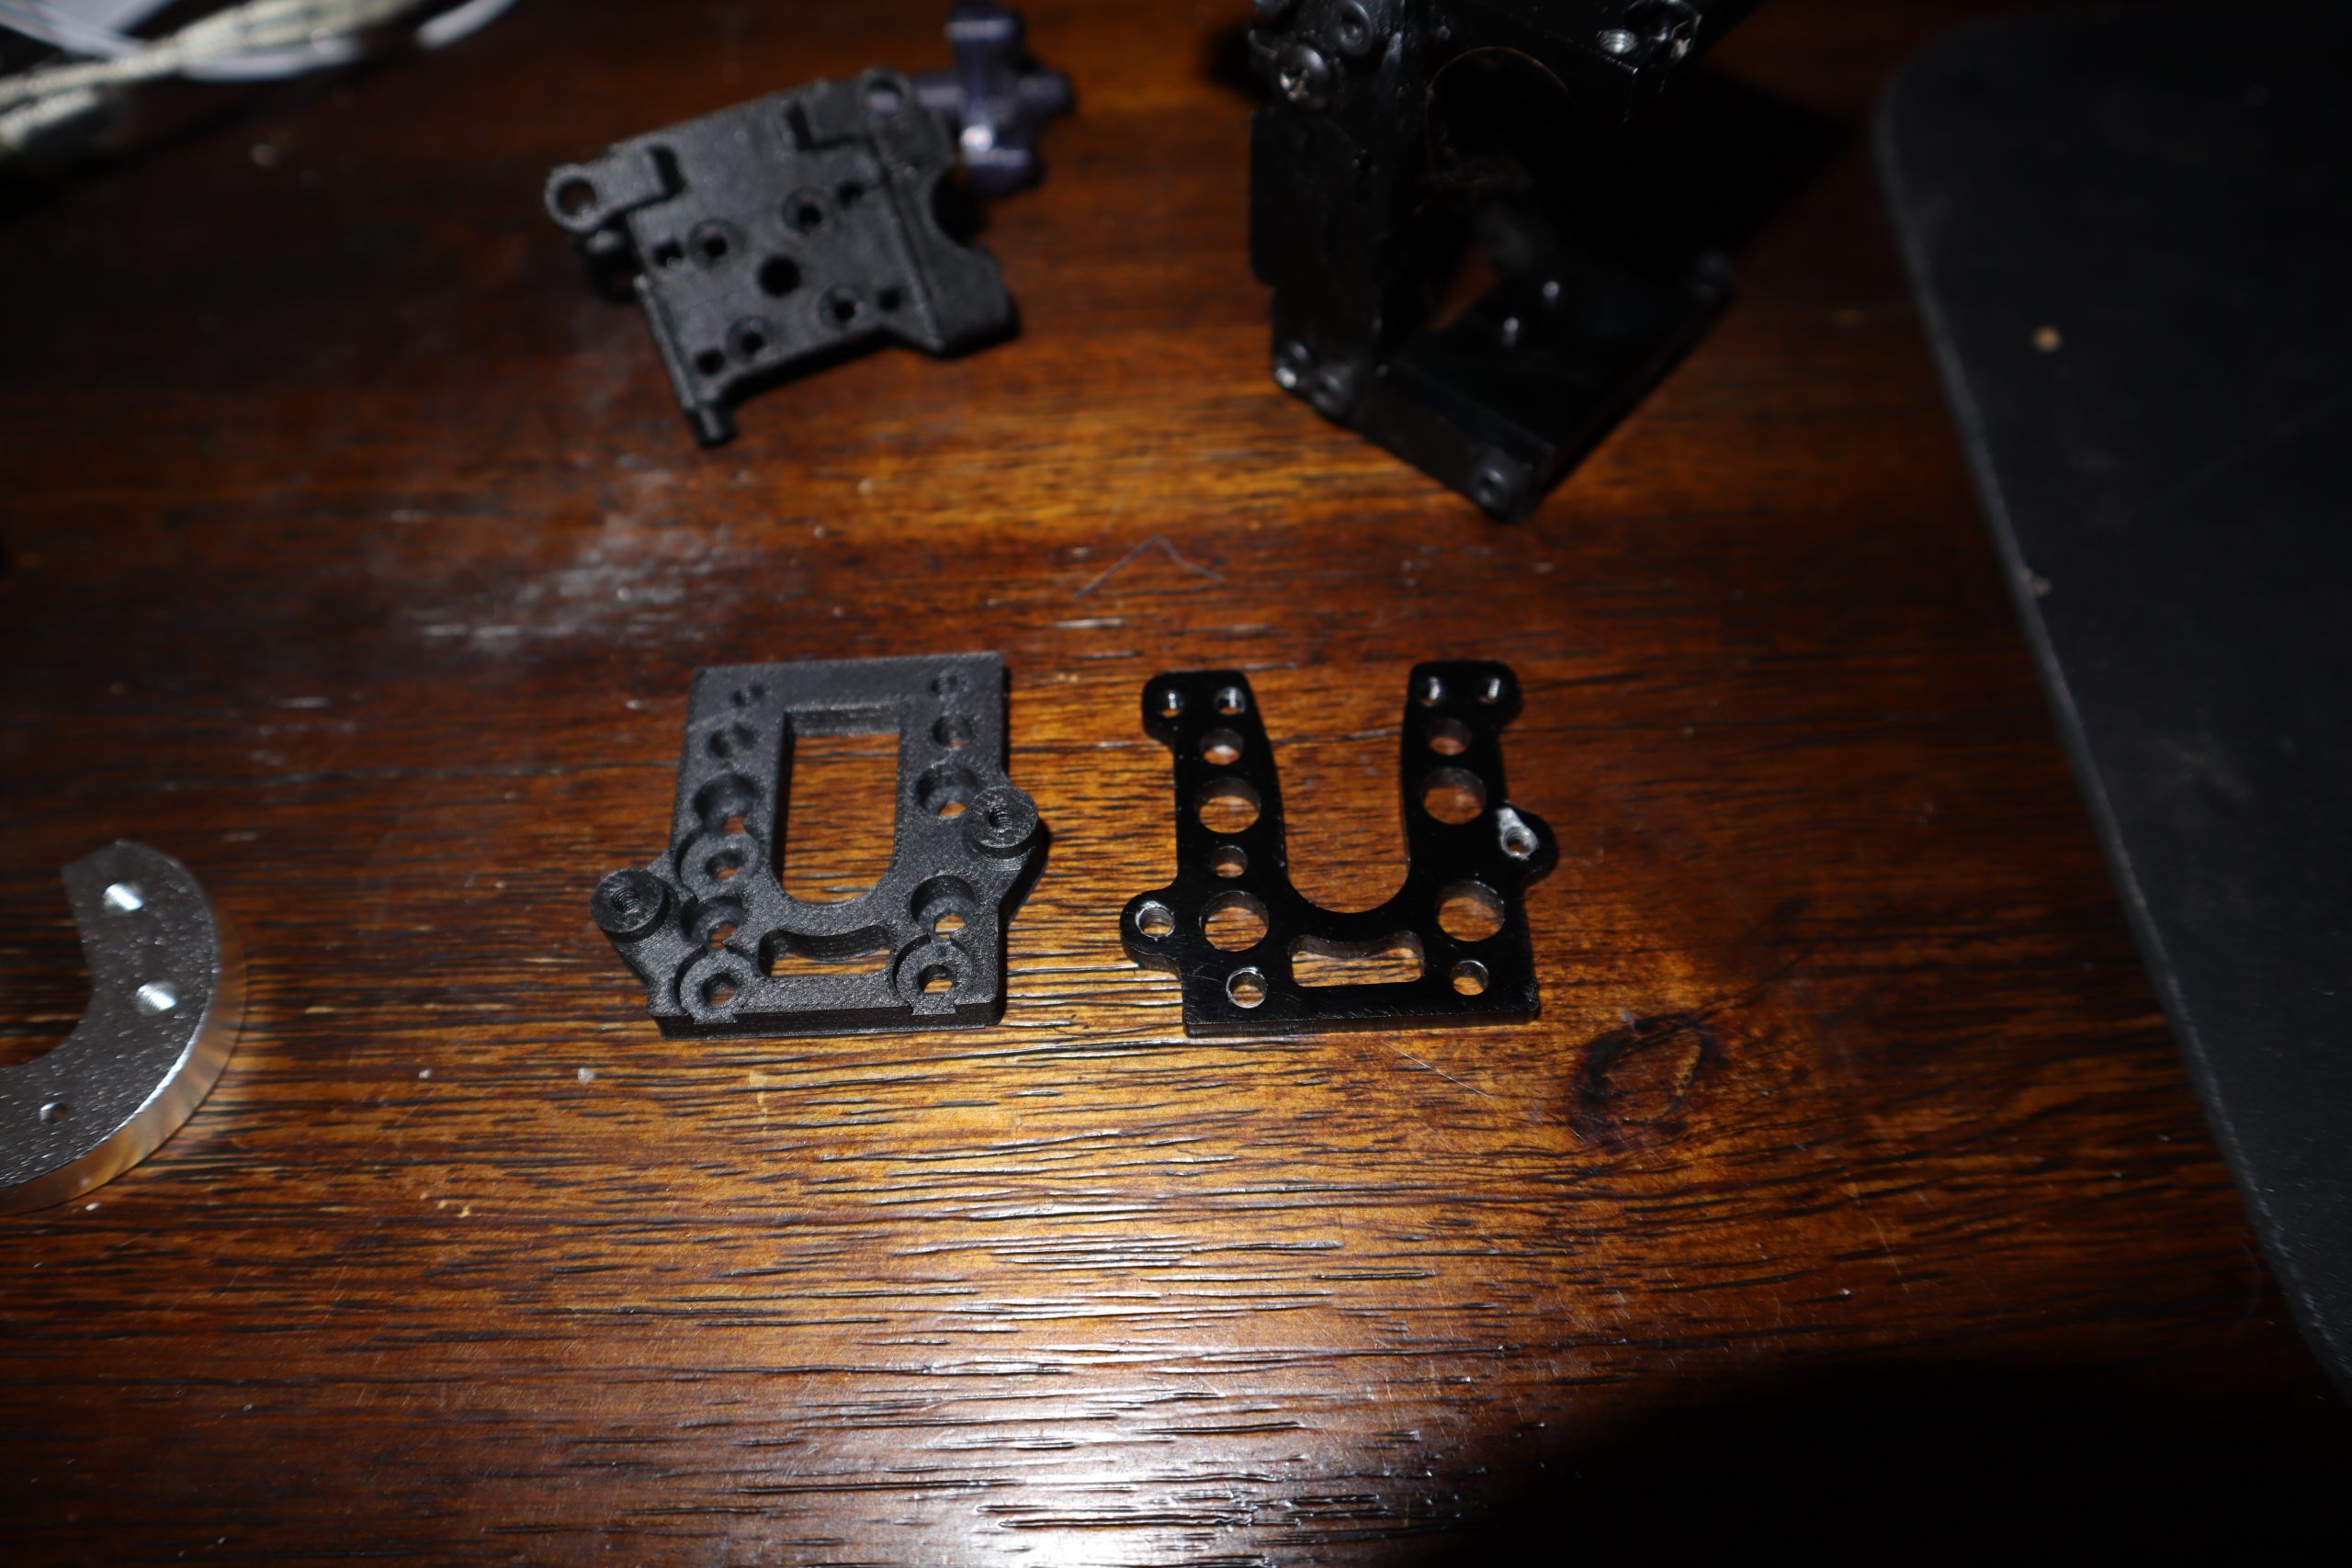
We kept working and Jake has had nothing but bad luck with his genuine Mosquito, so he said, “I am done, I’ll just go dragon, we can just do yours and Tom’s for everything.” I hated the way he sounded, as I knew he was bothered. In past I have talked to Tom, and was just talking to Theodor Lasenko the other day, where I mocked it up on a screenshare with the hotends turned 90 degrees. Turned out, the mosquito could mount just as close as the dragons. Funnily enough, Jake had just turned the hotend 90 degrees on his mount too. Then the last thing happened, which was that Berd-Air become viable. A lot have posted online having loud noise, and bad performance but after a lot of testing I found settings for the pump that are great, and between that and a few other tricks, I can print 85 degree overhang with Berd-Air. So end result is that Jake has decided to just jump back over, and we will add mounting holes for a mosquito so now its one design that makes it cheaper for all and just is simpler in many ways. It’s already daunting having a fan duct, a Berd-Air mount, two types cable chains (stock and Voron style), two BLTouch mounts, etc, so we finally are ready to take a tally for orders and place the order. I am working on a full bill of materials, so I can figure out what the upgrade actually costs when all the bolts, etc, is accounted for, because I have tried a lot of different things to arrive at the final bill of materials. Also I have about 30 hrs in on last mounts and 20 hrs in on the newest cable chain brackets with optical endstop, and it seems rock solid.


I am also making some more changes to the orbiter for ease of printing and to it mount better.


 Unlock with Patreon