Posted on 2 Comments

Pressure Advance: The Easy Way, “Just use the new tool”

Linear Advance Calibration Pattern | Marlin Firmware (marlinfw.org)

The tools tab now has native generators on it.

This is a basic guide on making a PA (Pressure Advance) gcode file. I plan on forking the code and changing it to natively generate the gcode for RRF and Klipper, but it’s easy, so I am not making that a priority. Just use the above-linked tools.

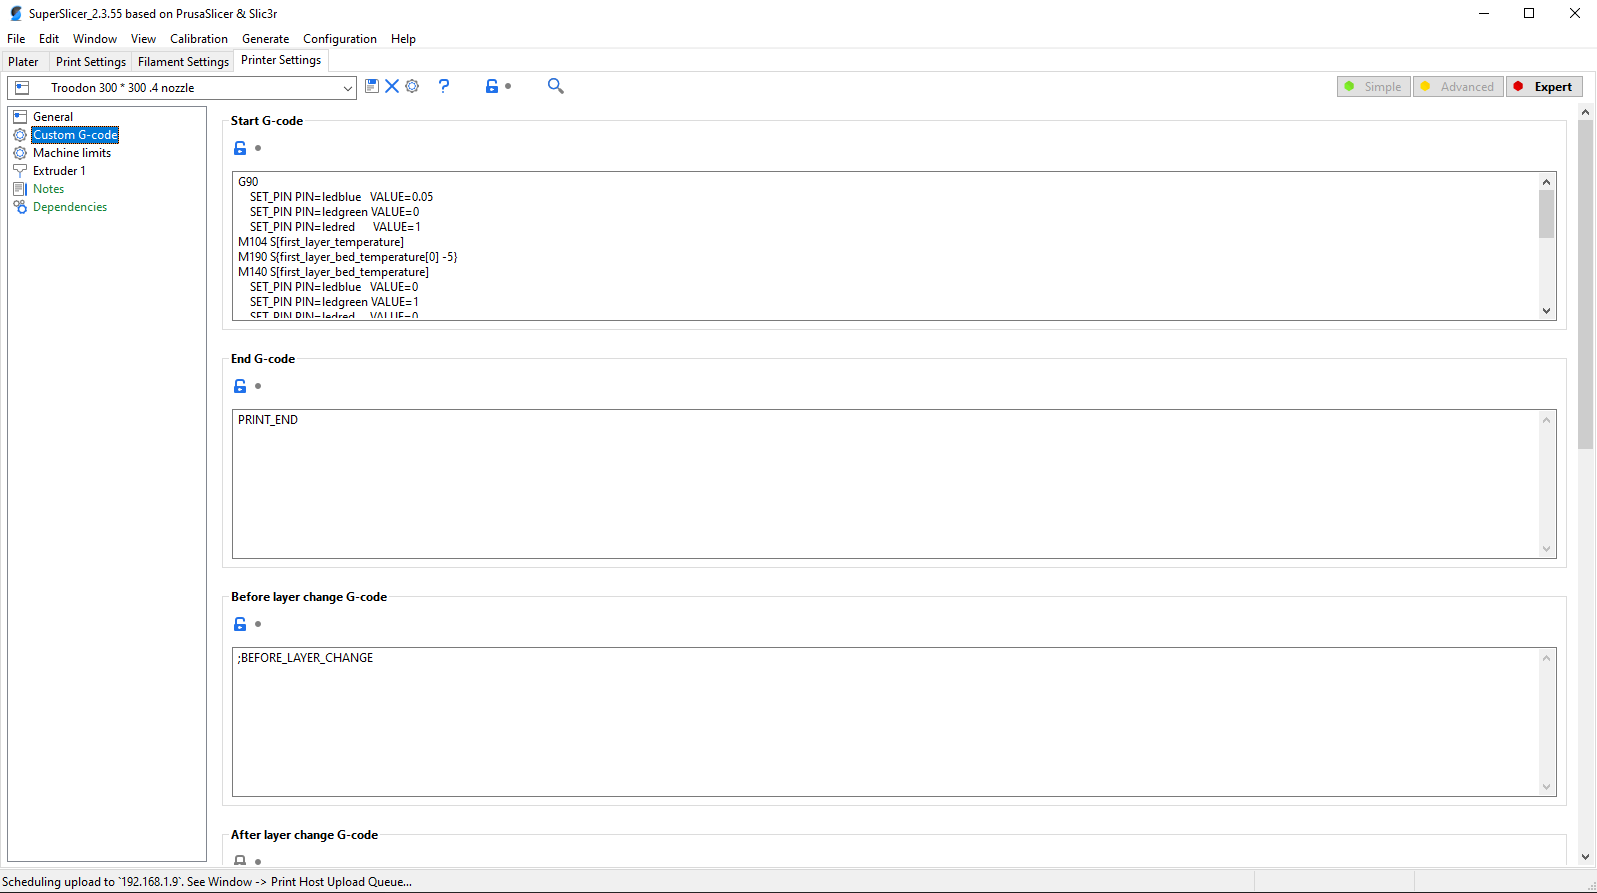
  1. Generate the gcode for marlin inputting your settings for the filament and nozzle you are using. You want .005 steps ranging from 0 to .1 for most nozzles and filaments. If your filament is very soft or your nozzle is small, then .2 may be better as a maximum value.
  2. Add a G32 after the G28 in the side panel.
  3. Add a T2000 after the P500 on the acceleration line.
  4. Download and open in notepad, or some other simple editor that does not format text.
  5. Use find and replace to find M900 K and replace it with the respective values:
    1. Klipper is SET_PRESSURE_ADVANCE ADVANCE=
    2. RRF is M572 D0 S
  6. Save the file, making sure the extension is .gcode.
  7. Upload to the printer and print.
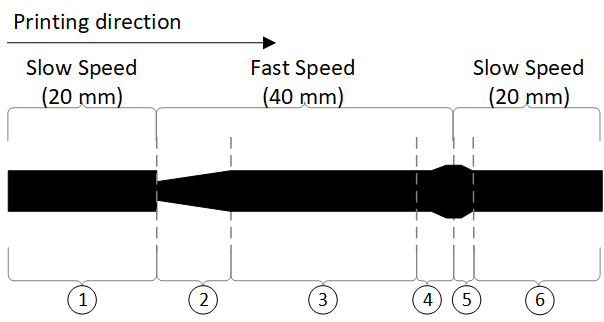
  8. Find the line that stays most uniform at the speed changes marked by the top two vertical lines.
  9. Enter the corresponding value in your slicer’s filament gcode override. If slicer does not have that, then enter it into your start code and name that profile for the filament you calibrated.

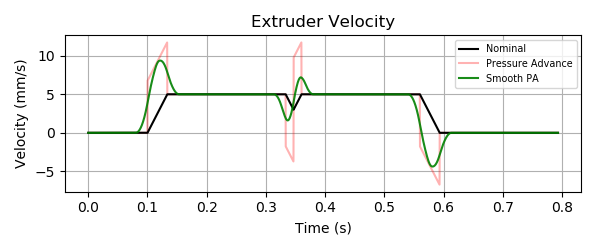
I found some cool diagrams that show the improvements with Klipper pressure advance compared to regular Linear Advance (LA) and PA with the smooth pressure advance algorithm. With direct drive, it does not matter as much, but with Bowden and high values, Marlin and RRF have a hard time keeping up and end up slowing the print a lot to maintain the max acceleration for the extruder in firmware. So, a stock 300 really needs 1.9 and that doubles print times on RRF. With Klipper, it is not a problem and it does not reduce the acceleration as the extruder hits its ceiling. Instead, it smooths out the max values and extends them slightly to the same end result. You can configure the smoothing time if you really are pushing things, but the stock value is adequate. We do not want to reach the point where we start reducing the effectiveness of the pressure advance. This all is not important if running direct drive since we rarely need more than .1 seconds of Pressure Advance with the Orbiter or most other high-end solutions. I just figured it would be interesting to give some background on what is happening under the hood.

https://github.com/KevinOConnor/klipper/issues/1260
Posted on Leave a comment

DDE Plate, and why you need it

The DDE (Direct Drive Extruder) kit is one of the most important upgrades for your Troodon’s if you want to be serious about performance and reliability. However, this does not mean it is perfect. The stock plate mounts with only 3 bolts that are heavily leveraged against as shown in following video.

Comparison of stock and upgraded DDE mounting plates

The STL for the upgrade plate is available for download using the link below.

https://drive.google.com/file/d/12Kvd5OL-qsA94Lqb9yHYOjGK3acGJ8lc/view?usp=sharing

Posted on 4 Comments

Klipper guide for flashing and install

Alex Or is helping by putting a lot of my pictures and information together into a presentation. It should be ready soon, he had me review his draft. We are making a few changes, but it looks great already. It is time to make a video of the flashing procedure, so Jake Allen installed a new board and let me record a remote session of me flashing it for him.

Here is a video showing the basic harness install.

Holger asked for a picture of the pi camera mounting location.

Posted on Leave a comment

Klipper harness install

The klipper harness is assembled with the intent of using the small triangles on the harness to locate the pins.

A rpi diagram courtesy of raspberrypi.org shows the pin numbers here

GPIO - Raspberry Pi Documentation
https://www.raspberrypi.org/documentation/usage/gpio/

The harness comes with a diagram and shows the pin numbers. The main harness, the connector on the right in the below image, has the pin marked with a triangle go to pin number 2.

The harness connector on the left is for the accelerometer, and is not needed for the main install.

Connect the Panel Due harness in the manner that is described in the video below. Be careful of the orientation of the Panel Due plug you remove, and connect the power wires as described.

One of my Patreons is working on a presentation documenting the install, so I will add it when it is ready.

Posted on Leave a comment

Easy weight reduction

4010 fan shrouds

The stock setup has a groove mount plate and an assembly that is just too heavy. As much as it is better than a lot of other groove mount implementations, I see that it can be made better.

This last image is a sneak peak at the difference the upgraded carriage makes and how it brings things to the next level. It shows over 900g can become low 6xx grams and that is with a bigger, stronger mgn12 rail instead of the stock mgn9. A lot of the weight is no longer tossed around in the cable chain, and the loads are now inline with each axis, so there is less resonance and less inertia in awkward planes. What started as a dual extrusion and 2.4 style cable chain has turned into much more and really (in my opinion) brought this printer into a whole different category. It is probably going to perform at the top of that “$10k range printer” level.

This are the dragon mount and the 5015 fan shroud download links.

https://drive.google.com/file/d/1BtnqhWhkixEPdtRQnBg3gijz13YyvnBc/view?usp=sharing

https://drive.google.com/file/d/1qeLU5dZkYZxnouUQ3TwafIUh0kFKA1pV/view?usp=sharing

I do have stock fan shrouds too, but I think I have to adjust the height to work with the dragon and other short hotends, as I have modified these for someone with a stock setup when I first got the printer.

4010 fan shrouds
4010 fan shroud bottom view
Posted on Leave a comment

RRF aka stock troodon start scripts will be doing all slicers anyone asks for

This is start scripts i am doing cura,s3d,superslicer,prusaslicer but i will add anything anyone asks for i just may need them test it once for me to make sure i get the variable right . this will speed heating a lot as it will do things in tandem instead of waiting plus includes purge line to to make sure it clear and retract at end to make sure no clogs or ooze .