Posted on Leave a comment

DDE Plate, and why you need it

The DDE (Direct Drive Extruder) kit is one of the most important upgrades for your Troodon’s if you want to be serious about performance and reliability. However, this does not mean it is perfect. The stock plate mounts with only 3 bolts that are heavily leveraged against as shown in following video.

Comparison of stock and upgraded DDE mounting plates

The STL for the upgrade plate is available for download using the link below.

https://drive.google.com/file/d/12Kvd5OL-qsA94Lqb9yHYOjGK3acGJ8lc/view?usp=sharing

Posted on 4 Comments

Klipper guide for flashing and install

Alex Or is helping by putting a lot of my pictures and information together into a presentation. It should be ready soon, he had me review his draft. We are making a few changes, but it looks great already. It is time to make a video of the flashing procedure, so Jake Allen installed a new board and let me record a remote session of me flashing it for him.

Here is a video showing the basic harness install.

Holger asked for a picture of the pi camera mounting location.

Posted on Leave a comment

Klipper harness install

The klipper harness is assembled with the intent of using the small triangles on the harness to locate the pins.

A rpi diagram courtesy of raspberrypi.org shows the pin numbers here

GPIO - Raspberry Pi Documentation
https://www.raspberrypi.org/documentation/usage/gpio/

The harness comes with a diagram and shows the pin numbers. The main harness, the connector on the right in the below image, has the pin marked with a triangle go to pin number 2.

The harness connector on the left is for the accelerometer, and is not needed for the main install.

Connect the Panel Due harness in the manner that is described in the video below. Be careful of the orientation of the Panel Due plug you remove, and connect the power wires as described.

One of my Patreons is working on a presentation documenting the install, so I will add it when it is ready.

Posted on Leave a comment

Easy weight reduction

4010 fan shrouds

The stock setup has a groove mount plate and an assembly that is just too heavy. As much as it is better than a lot of other groove mount implementations, I see that it can be made better.

This last image is a sneak peak at the difference the upgraded carriage makes and how it brings things to the next level. It shows over 900g can become low 6xx grams and that is with a bigger, stronger mgn12 rail instead of the stock mgn9. A lot of the weight is no longer tossed around in the cable chain, and the loads are now inline with each axis, so there is less resonance and less inertia in awkward planes. What started as a dual extrusion and 2.4 style cable chain has turned into much more and really (in my opinion) brought this printer into a whole different category. It is probably going to perform at the top of that “$10k range printer” level.

This are the dragon mount and the 5015 fan shroud download links.

https://drive.google.com/file/d/1BtnqhWhkixEPdtRQnBg3gijz13YyvnBc/view?usp=sharing

https://drive.google.com/file/d/1qeLU5dZkYZxnouUQ3TwafIUh0kFKA1pV/view?usp=sharing

I do have stock fan shrouds too, but I think I have to adjust the height to work with the dragon and other short hotends, as I have modified these for someone with a stock setup when I first got the printer.

4010 fan shrouds
4010 fan shroud bottom view
Posted on Leave a comment

RRF aka stock troodon start scripts will be doing all slicers anyone asks for

This is start scripts i am doing cura,s3d,superslicer,prusaslicer but i will add anything anyone asks for i just may need them test it once for me to make sure i get the variable right . this will speed heating a lot as it will do things in tandem instead of waiting plus includes purge line to to make sure it clear and retract at end to make sure no clogs or ooze .

Posted on Leave a comment

Gcode visualizer and more plugins

this is a beta version of the newest dwc for the 3.2 rrf it is awesome it works with my posted update for rrf3 which i have tweaked the install guide a little to make it very easy and bullet proof. You should be able to simply dload the duet 2and3 zip file and click install thats it . Then dload this beta by uploading in the system tab as well. The web control may work with 2x to i am going to downgrade and report back to let everyone know for people intimidated by the rrf3 upgrade 

Should work with rrf2 as well

Posted on 5 Comments

RRF3 Upgrade Troodon

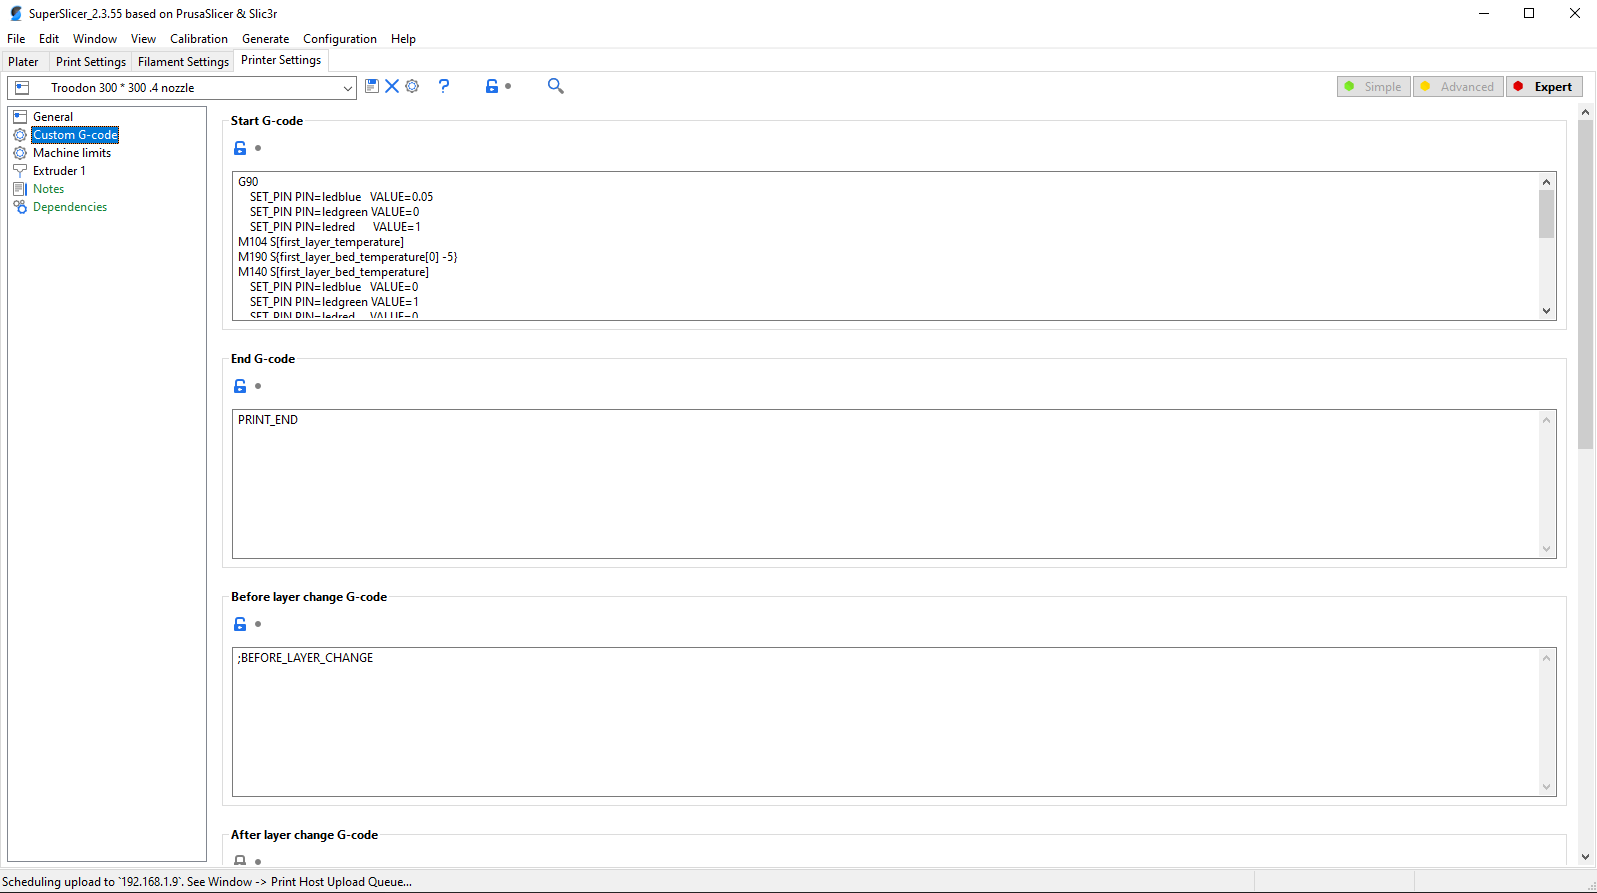
1.     First upload the .g files for your printer but delete the 300 or 400 off the back and do not restart.

 2.    Then upload DuetWebControl-SD-2.1.6.zip while inside the System tab, also upload the following bin files from the sys directory, one at a time, in order. Don’t install and restart when prompted for these but upload all then go back and upload again clicking install the second time around . Duet2CombinedIAP.bin, DuetWiFiServer-1.23.bin, Duet2CombinedFirmware_3.0.0.bin . Should be good but if any problems go to console on printer and enter m997 s0:1 

Notes 

Baud rate must be set to 57600 on the panel please do before starting but if you forget and it isn’t connecting you can change after. I updated instructions to just manually install from printer screen encase files get installed in wrong order this adds few steps but makes It less likely to lose wifi saved settings during upgrade. 

*****These configs are for dd extruder if you want to use stock you need to change back to 1200 mah for the extruder driver and also stock timings which are B2 Y4:4 F4 and you do not need to use the bed.g files I just like the double tram I set up. Also make sure to adjust to your probe offset unless you have it saved in your config override. You also will need to revert to original steps which should be around 413 iirc.

******anyone wanting help just send me a zip with their sdcard minus the gcode folder and i will setup everything so that you can just upload the files i send back and not have to worry about anything or can manually take sd card out and copy the files back ont o sd card put back in printer and run a macro from screen i setup for you.